Red Velvet Cupcakes with Peppermint Frosting

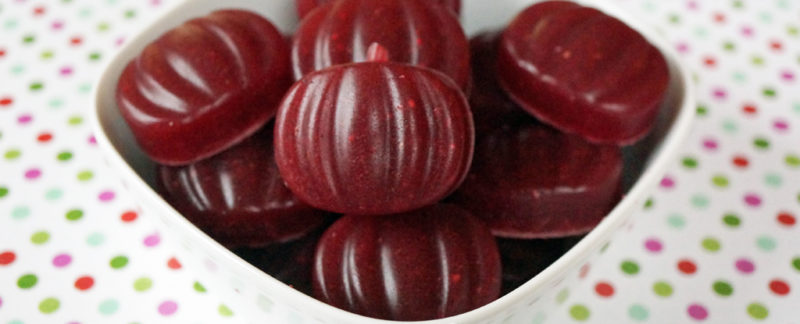
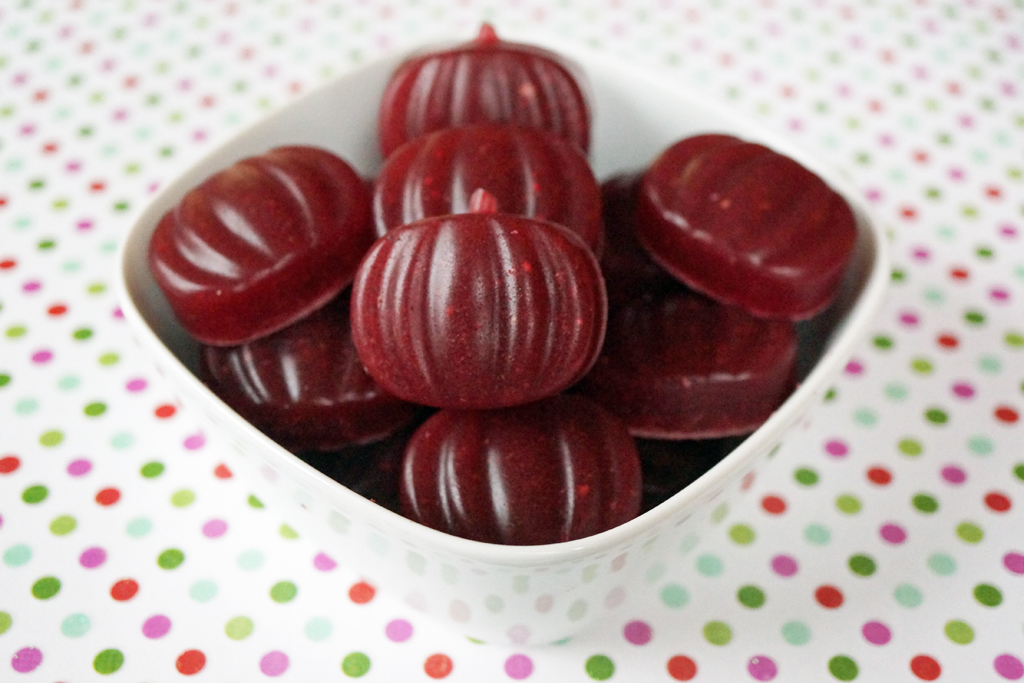
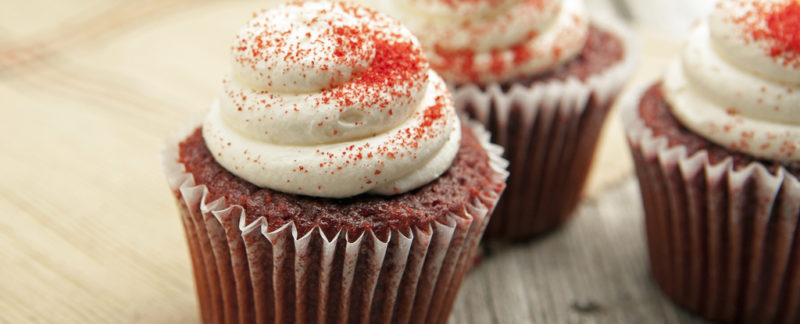
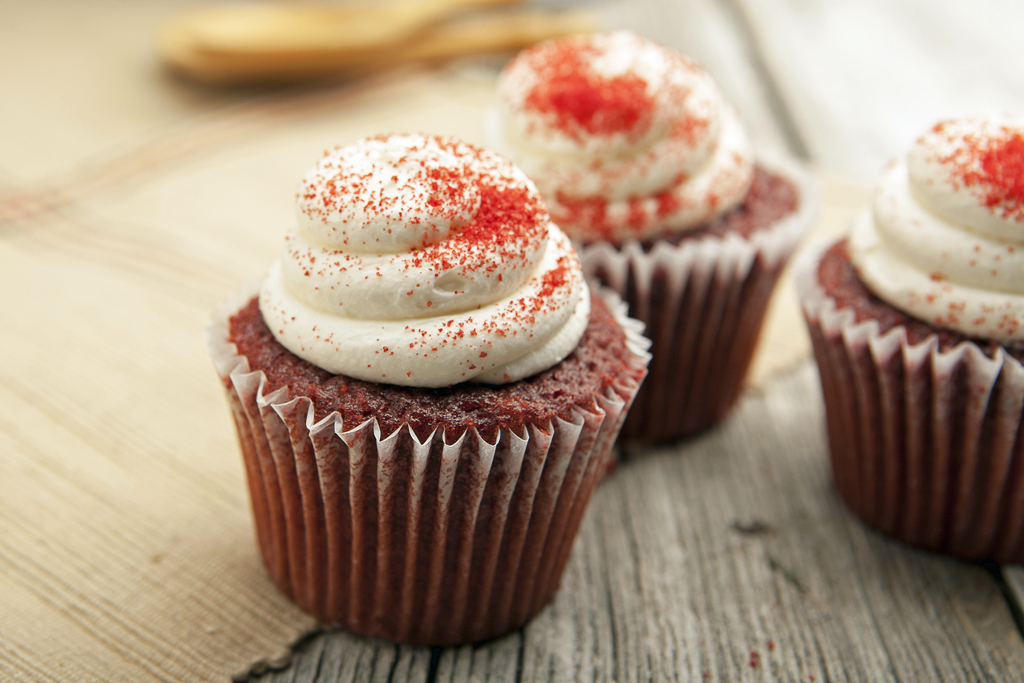
I like to create treats for my son that will surprise him in some way. He always knows he can expect them to taste delicious and I always know they will be healthy for him. A win win! So as Valentine’s day approaches I started thinking about red treats. Red velvet cake came to my mind immediately.

Red Velvet cupcakes have a long history in our culture. The real question is whether or not they were ever truly red. Today we see them as red due to food coloring. But it may just have been an over exaggeration of the deep brown hue that dark chocolate had and as the years went by bakers improvised by adding red food coloring. Perhaps the red velvet was more of a description of the “velvety” texture associated with this type of chocolate cake more than it was the color. I mean, it’s not super sexy to say brown chocolate cake vs. deep red chocolate cake. It just brings to mind something a little racier and extravagant. And maybe a little secretive or surprising too.

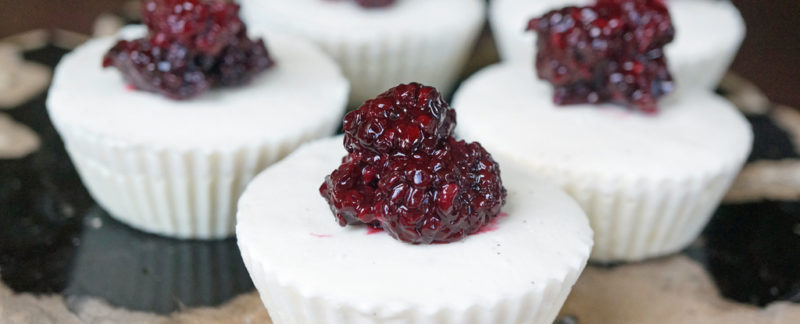
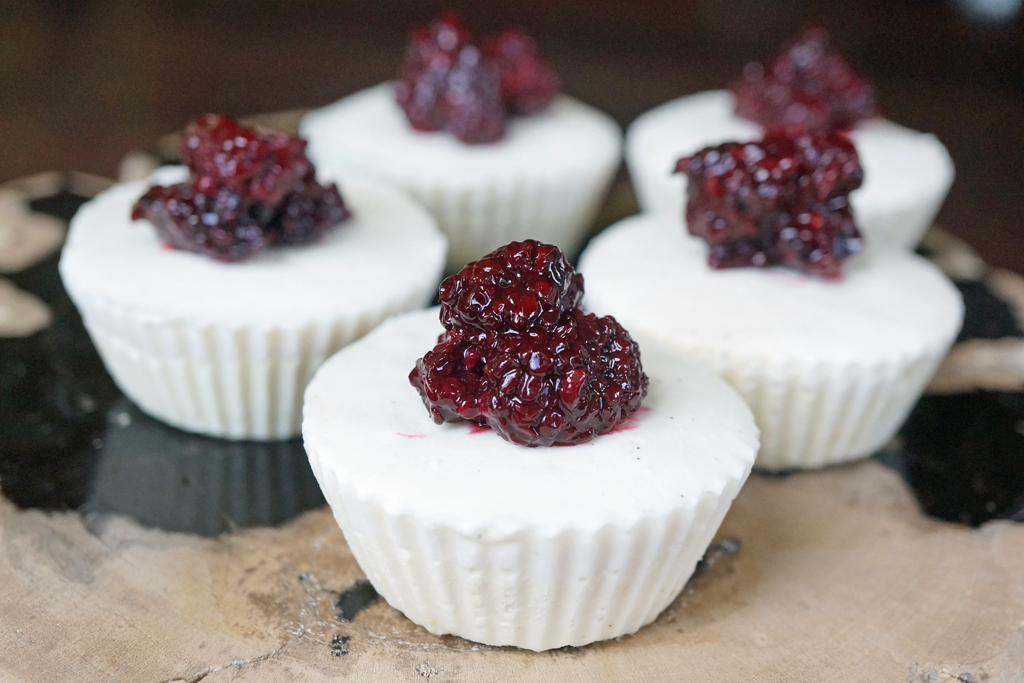
Most recipes you find for red velvet cake are sweet and often a bit tart due to buttermilk. This recipe does not use buttermilk though the cream cheese frosting does bring a little tang to the party. One thing is for sure, the texture of these cupcakes is divine. Please use gel food coloring for this recipe, it is more intensely colored than liquid coloring and if you are adverse to food coloring I promise it will taste equally as decadent without it!

Red Velvet Cupcakes with Peppermint Frosting
 
Author: 
Nutrition Information
  • Serves: 6 Servings
  • Serving size: 1
  • Calories: 256
  • Fat: 23.7g
  • Carbohydrates: 14.2g
  • Fiber: 8.3g
  • Protein: 5.8g
Ingredients
Cupcakes
  • 3 large eggs
  • 3 tbsp coconut milk
  • 3 tbsp unsalted butter, melted
  • ¼ cup xylitol
  • Pinch pure powdered stevia
  • 1 tsp vanilla
  • ½ tsp red food coloring (use less if using a gel food color)
  • ¼ cup coconut flour
  • 2 tbsp unsweetened Dutched cocoa powder
  • ¼ tsp baking powder
  • ¼ tsp salt

Cream Cheese Frosting
  • ½ cup cream cheese
  • ¼ cup unsalted butter
  • 2 tbsp erythritol
  • ½ tsp vanilla
  • ¼ tsp peppermint extract
  • 4 sugar-free starlight mints (optional)
Instructions
  1. Make Cupcakes: Preheat oven to 375°F. Prepare a muffin tin with paper cups or use a silicone mold.
  2. In a medium bowl, whisk the eggs with the coconut milk, butter, xylitol, stevia, vanilla and red food coloring.
  3. In a separate bowl whisk together the coconut flour, cocoa powder, baking powder and salt. Add the egg mixture and whisk to fully incorporate the dry ingredients.
  4. Divide into the muffin cups, place in the oven and bake for 15-18 minutes until fully set in the center. Remove from the oven and cool for 10 minutes before removing from the pan and finish cooling on a wire rack.
  5. Make Cream Cheese Frosting: Powder the erythritol and set it aside. In the bowl of a stand mixer or with an electric mixer, beat the cream cheese until smooth. Add the butter and beat for 1 minute. Add the erythritol, vanilla and peppermint extract beating until incorporated into a smooth frosting; about 1 minute. Frost cupcakes and top with crushed mints (optional).
Notes
Net Carbs : 2.3
sugarOH : 12
 

Red velvet cupcakes will be the center piece at my home this Valentine’s day. But if red velvet isn’t your thing try these delicious brownies instead! Or perhaps cookies are more your love language?!


Spiced Pumpkin Chocolate Bark

Do you shop at Trader Joe’s?  Do you find it annoying that everything looks and sounds so appealing… but you are watching out for added sugars and trying to be healthier about your choices.  Welcome to my world.  BUT I saw this pumpkin granola bark on the shelf there and thought to myself… I need to make this today.  So I did.  I hope you love it as much as I do.  No guilt, no worries, easy and so so worth it!

Spiced Pumpkin Chocolate Bark
 
Author: 
Nutrition Information
  • Serves: 10
  • Serving size: 1 piece
  • Calories: 111
  • Fat: 10.1g
  • Carbohydrates: 14.4g
  • Fiber: 11.2g
  • Protein: 2.3g
Prep time: 
Cook time: 
Total time: 
Ingredients
Instructions
  1. Melt chocolate in a microwave safe bowl at 30 second intervals.
  2. Spread chocolate onto the bottom of an 8x8-inch pan using an offset spatula.
  3. Sprinkle granola over the melted chocolate and gently press it in so that it adheres to the chocolate. Set aside for an hour or place in the refrigerator to quickly cool and harden.
  4. Once hardened score into 10 pieces and store in the refrigerator for up to 2 weeks. Do not freeze.
Notes
Net Carbs = 3.2g
SugarOH = 5g
 

Cranberry Collagen Yummies

Pop-able Cranberry Yummies are not just for kids, especially if you want a healthy holiday treat!  It’s like cranberry sauce that had babies.  These bite sized treats are high in vitamin C and collagen for healthy skin, hair, nails and your gut.   You could also turn these into a delicious parfait by finely chopping (or us a blender pulsing just a few times) and adding to whipped cream or coconut cream.  Top with a sprinkle of cinnamon and orange zest and you have the perfect Keto dessert.

Cranberry Collagen Yummies
 
Author: 
Nutrition Information
  • Serves: 34
  • Serving size: 1
  • Calories: 9
  • Fat: 0g
  • Carbohydrates: 1.7g
  • Fiber: 1.3g
  • Protein: 0.7g
Prep time: 
Cook time: 
Total time: 
Ingredients
  • 4 ½ oz fresh or frozen cranberries (about 1 ¼ cup)
  • 1 cup water + 2 tbsp, divided
  • ½ tbsp lemon juice
  • 1 tbsp orange zest
  • 3 tbsp xylitol
  • 1 pinch pure stevia (20 drops of liquid)
  • 1 tsp cinnamon
  • ½ tsp ginger
  • ⅛ tsp cloves
  • 4 tbsp gelatin
  • 2 tsp vanilla
Instructions
  1. Place cranberries, 2 tbsp of water, lemon juice, orange zest, xylitol, stevia, cinnamon, ginger and cloves in a sauce pan over medium heat and bring to a boil. Cook for 10-15 minutes stirring occasionally until all the cranberries pop. Remove from heat and set aside.
  2. In a small with the remaining 1 cup of water sprinkle the gelatin over the top while whisking until it does not have any additional lumps. Let it sit for 2 minutes to bloom or soften.
  3. Transfer the cranberry mixture to a blender and blend until smooth.
  4. Once the gelatin has softened add it to the warm pan used for the cranberries and heat over very low heat while stirring until the gelatin has melted and becomes clear. Add the cranberry mixture and vanilla. Taste to adjust sweetness, if desired add additional stevia to your taste. To add additional flavor add ½ drop* each of cinnamon, clove and ginger essential oils and 3-4 drops orange essential oil. *Use a toothpick to add.
  5. Pour into individual 1 tbsp silicon molds or into an 8x8 inch pan lined with plastic wrap. Place in refrigerator for 2 hours to set up then remove from mold or cut into 34 pieces and store in an air tight container. Store in the refrigerator for up to 1 week but do not freeze.
Notes
Net Carbs = 0.4g
SugarOH = 1.1g
 

Probiotic NY-Style Non-Dairy Cheesecake

Probiotic Cheesecake?  What in the world is that, you may ask.

Probiotic foods are quite popular for a very good reason.  Probiotics are the healthy bacteria that normally reside in your gut.  They are highly beneficial to our health and are best when served within their natural habitat (in other words with the foods they like to eat and can grow from).

This cheesecake,  aside from being creamy, healthy and dairy free, is quite possibly one of the healthiest desserts around!

To make it cashews are cultured with probiotics (much like yogurt) and since it is not cooked the probiotics remain active.  A luscious probiotic sour “cream” made from coconut milk is added to the top.  As always it is sugar free and low in carbs.

I added a quick blackberry topping to give it some color and decadence.  Try topping it with your favorite berry!

Sweet Synergy


More delicious recipes in my book, Sweet Synergy!


Probiotic NY-Style Non-Dairy Cheesecake
 
Author: 
Nutrition Information
  • Serving size: 1
  • Calories: 150
  • Fat: 12.2g
  • Carbohydrates: 8.6g
  • Fiber: 3.2g
  • Protein: 3.3g
Ingredients
  • Cheesecake Filling:
  • 2 cups raw cashews
  • 2 probiotic capsules (or ¼ cup unsweetened coconut yogurt or whey from milk or coconut kefir)
  • 2 tbsp coconut oil
  • 1 lemon (zested and juiced, 2 tsp zest and 2 tbsp juice)
  • 2 tbsp xylitol, powdered
  • 2 pinches pure powdered stevia
  • 2 tbsp unsweetened coconut milk or water
  • 1 tsp gelatin
  • 2-3 drops lemon essential oil (optional)
  • Cheesecake Topping:
  • 14oz can of unsweetened coconut milk or cream
  • 2 probiotic capsules (or ¼ cup unsweetened coconut yogurt or whey from milk or coconut kefir)
  • 2 tbps xylitol, powdered
  • 1 pinch pure powdered stevia
  • 2 tsp vanilla extract
  • 2 tbsp unsweetened coconut milk or water
  • 1 tsp gelatin
Instructions
  1. Filling:
  2. Soak nuts overnight or for at least 8 hours and as much as 24 hours in a large bowl with filtered water. Drain and place in a blender with the coconut oil.
  3. Blend until the cashews become a very fine paste adding water a tablespoon at a time if necessary to create a very smooth and thick mixture.
  4. Break open the probiotic capsules (or add the other options) and add to the nut mixture. Blend for 1-3 pulses until combined.
  5. Pour mixture into a bowl, cover loosely with a clean kitchen towel or clean paper towel and place in a dark area in your kitchen (I place mine in a cabinet so it won’t be disturbed and won’t be affected by light). Allow the probiotic cashew mixture to sit undisturbed for 24-48 hours. Test after 24 hours to see if it is sour enough for your taste. Place in the refrigerator in a container with a tight fitting lid.
  6. After both the filling and topping (below) have been cultured (either before or after refrigeration) stir the lemon zest, lemon juice, xylitol and stevia (add lemon essential oil now too if using) into the cheesecake filling. Set aside.
  7. Place the coconut milk into a small microwavable bowl and sprinkle the gelatin over the top; allow to rehydrate for 2-3 minutes then microwave for 10-15 seconds until all the gelatin has melted and appears clear (do not boil). Add 2-3 tbsp of the cheesecake filling to the bowl of gelatin and stir until blended then blend that into the rest of the filling. Set aside.
  8. Topping
  9. Heat the coconut milk to 115°F, remove from heat and set aside to cool down to 100°F.
  10. Once the milk has reached 100°F, break open the probiotic capsules and sprinkle them onto the warm milk. Whisk until uniform. Pour mixture into the container of your yogurt maker or pour into a container with a cover (not airtight) and set in a warm location in your kitchen (an oven with the oven light on works fine) for 18-24 hours.
  11. After the coconut milk has cultured, place into a container and blend in the xylitol, stevia and vanilla until smooth. Set aside.
  12. Place the coconut milk into a small microwavable bowl and sprinkle the gelatin over the top; allow to rehydrate for 2-3 minutes then microwave for 10-15 seconds until all the gelatin has melted and appears clear (do not boil). Add 2-3 tbsp of the cheesecake topping to the bowl of gelatin and stir until blended then blend that into the rest of the topping. Set aside.
  13. Putting It All Together:
  14. At this point both the filling and topping are cultured and all the ingredients have been added for both. Placing them in the refrigerator at this point will produce thickened filling and topping – it will set the gelatin. Both the filling and topping can be made up to a week in advance and stored in the refrigerator for optimal flavor and sour taste as long as they are made without the gelatin. The gelatin can be added just before assembling.
  15. Prepare a sheet pan with 14 silicon regular muffin cups (alternatively paper cups can be used in a muffin tin). Using a 3 tbsp scoop, scoop 3 tbsp filling into each muffin cup and then top with 1 tbsp of topping (you will have extra topping, use it to make a sugar-free granola parfait with berries – it’s delicious!) Place the sheet pan in the refrigerator for at least 8 hours for the gelatin the fully set. When you plan to serve them, pop them in the freezer for an hour so they are easier to remove from the silicon or paper. Makes 14 regular muffin-sized cheesecakes or 1-9-inch cheesecake (in a spring-form pan; use all of the filling and 1 cup of the topping). Keep leftovers in a tightly sealed container in the refrigerator for up to 1 week or in the freezer for up to 1 month.
Notes
Net Carbs: 5.4g
SugarOH: 13g


More delicious recipes in my book, Sweet Synergy!

Sweet Synergy


    More delicious recipes in my book, Sweet Synergy!


Want to learn more?
    More delicious recipes in my book, Sweet Synergy!


More delicious recipes in my book, Sweet Synergy!


Kefir Buttermilk Ice Cream


Kefir Buttermilk Ice Cream
 
Author: 
Nutrition Information
  • Serves: ½ cup
  • Serving size: 1
  • Calories: 277
  • Fat: 23.6g
  • Carbohydrates: 17.5g
  • Fiber: 12g
  • Protein: 4.3g
Ingredients
  • 1 cup buttermilk, room temperature
  • 1 tbsp gelatin (unflavored)
  • ½ cup xylitol
  • 2 pinches stevia (or to taste)
  • 1 tsp lemon zest
  • ¼ tsp salt
  • 2 cups cream, cold
  • 1 cup milk kefir, cold (unflavored and homemade preferred)
  • ¼ cup lemon juice
  • 1 tsp vanilla (optional)
  • ¼ cup raspberries (optional)
  • ¼ cup blueberries (optional)
Instructions
  1. Sprinkle the gelatin onto ½ cup of the buttermilk in a small bowl. Set aside and allow to hydrate.
  2. In a small saucepan heat ½ cup of the buttermilk with the xylitol, stevia, lemon zest, and salt over medium-high heat. Continue to heat until all the sweetener has dissolved. Add the hydrated gelatin and continue to heat for until it has dissolved completely. Remove from the heat and allow to cool for 15 minutes.
  3. To the cooled buttermilk mixture add the remaining cold cream, kefir, lemon juice and vanilla. Pour the mixture into a plastic container, cover with a lid and put it in the refrigerator for at least 4 hours or overnight.
  4. Place the mixture in an ice cream maker and follow manufacturer directions. Once the ice cream is done serve immediately or pack into a freezer-safe container and place in freezer. The ice cream will keep in the freezer for up to one month. Place frozen ice cream in the refrigerator for 20-30 minutes before serving and use an ice cream scoop that has been dipped in hot water to serve more easily. Makes about 1 quart; 1 serving = ½ cup. Shown served with blueberries and raspberries.
Notes
Net Carbs : 5.5g
SugarOH: 12g